Excel Print provides a number of options for printing worksheets and workbooks. You can print the entire worksheet, a selected range of cells, or a specific table. You can also choose to print grid lines, headings, and formulas.
Print a Worksheet
To print a worksheet in Excel, execute the following steps.
1. On the File tab, click Print.
2. To preview the other pages that will be printed, click ‘Next Page’ or ‘Previous Page’ at the bottom of the window.
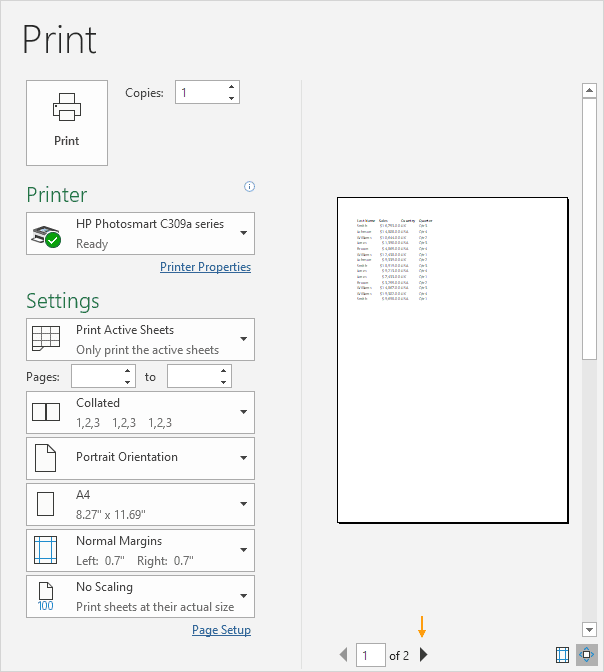
3. To print the worksheet, click the big Print button.

What to Print
Instead of printing the entire worksheet, you can also print the current selection.
1. First, select the range of cells you want to print.
2. Next, under Settings, select Print Selection.

3. To print the selection, click the big Print button.
Note: you can also print the active sheets (first select the sheets by holding down CTRL and clicking the sheet tabs) or print the entire workbook. Use the boxes next to Pages (see first screenshot) to only print a few pages of your document. For example, 2 to 2 only prints the second page.
Multiple Copies in Excel Print
To print multiple copies, execute the following steps.
1. Use the arrows next to the Copies box.
2. If one copy contains multiple pages, you can switch between Collated and Uncollated. For example, if you print 6 copies, Collated prints the entire first copy, then the entire second copy, etc. Uncollated prints 6 copies of page 1, 6 copies of page 2, etc.

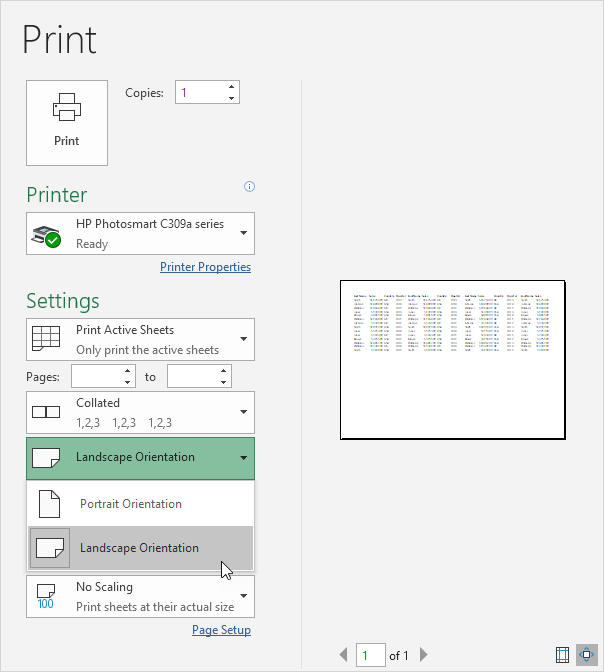
Orientation Excel Print
You can switch between Portrait Orientation (more rows but fewer columns) and Landscape Orientation (more columns but fewer rows).
Page Margins
To adjust the page margins, execute the following steps.
1. Select one of the predefined margins (Normal, Wide or Narrow) from the Margins drop-down list.
2. Or click the ‘Show Margins’ icon at the bottom right of the window. Now you can drag the lines to manually change the page margins.

Scaling in Excel Print
If you want to fit more data on one page, you can fit the sheet on one page. To achieve this, execute the following steps.
1. Select ‘Fit Sheet on One Page’ from the Scaling drop-down list.
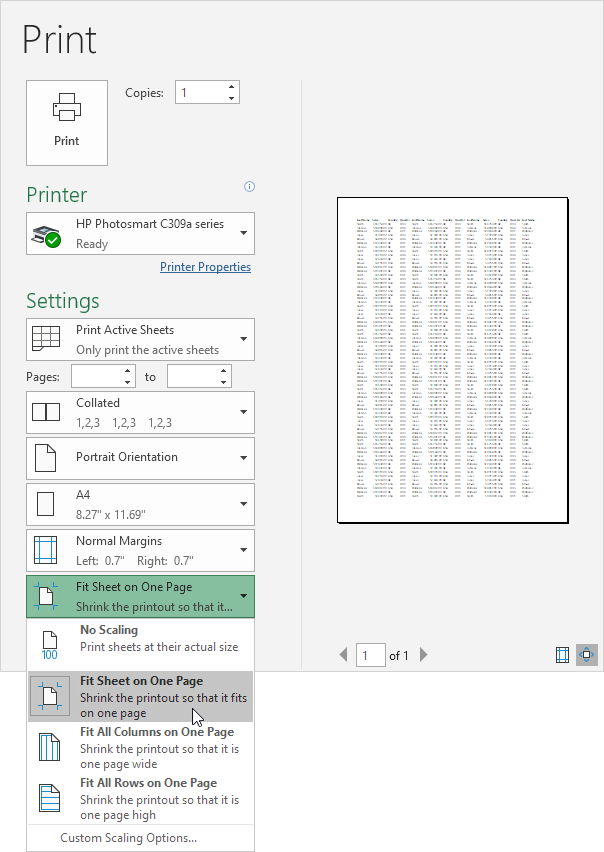
Note: you can also shrink the printout to one page wide or one page high. Click Custom Scaling Options to manually enter a scaling percentage or to fit the printout to a specific number of pages wide and tall. Be careful, Excel doesn’t warn you when your printout becomes unreadable.
Here are some additional information about printing of an excel file:
Printing options
- Print titles: Select this check box to print the row and column headings on every page.
- Grid lines: Select this check box to print the grid lines that appear on the worksheet.
- Formulas: Select this check box to print the formulas in the cells, instead of the values.
- Comments: Select this check box to print the comments that are associated with cells.
- Watermark: Select this check box to print a watermark on the printout.
Printing tips
- To print a specific range of cells, select the range of cells that you want to print and then click Print.
- To print the entire worksheet, click All in the Print range box.
- To print a preview of the printout, click Preview.
- To print the printout, click Print.
Troubleshooting
- If the printout is not printing correctly, check the printer settings to make sure that they are correct.
- If the printout is missing data, make sure that the print range is correct.
- If the printout is too large to fit on a single page, you can change the page orientation or paper size in the Page Setup dialog box.
- You can also use the Print Preview dialog box to zoom in and out of the printout to see if any data is being cut off.
| Next Chapter: Share |